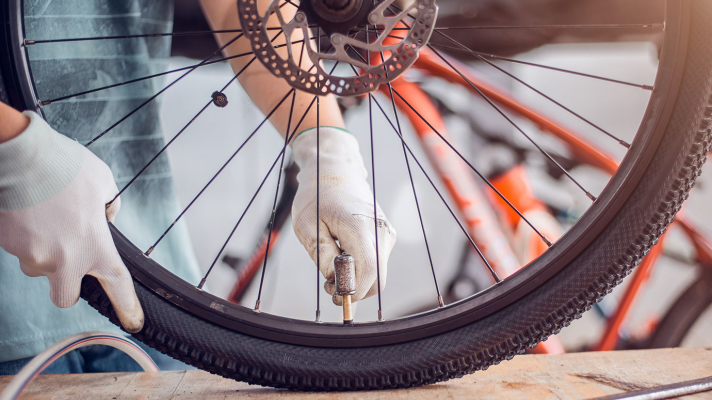
Fat bikes have taken the cycling world by storm, offering a unique riding experience that enables cyclists to traverse diverse terrains with ease. Whether it’s snowy mountains, sandy beaches, or muddy trails, fat bikes can handle it all, thanks to their wide tires that provide increased stability and traction. However, one aspect that often baffles riders is choosing the right tire pressure for their fat bike. This might seem like a small detail, but it can significantly impact your riding experience and the overall performance of your bike.
In this comprehensive article, brought to you by the experts at 4BiKE, we will delve into everything you need to know about fat bike tire pressure. We’ll discuss the importance of tire pressure, provide optimal pressure ranges for various terrains, and explore the factors that influence tire pressure. We’ll also share tips on how to find the perfect balance for your ride and how to measure and adjust tire pressure accurately. By the end of this article, you’ll have a solid understanding of fat bike tire pressure and how to optimize it for your unique riding style and preferences. So, let’s dive in and unravel the mystery of fat bike tire pressure!

The Importance of Tire Pressure
Tire pressure plays a critical role in the performance, comfort, and longevity of your fat bike. By setting the appropriate tire pressure, you can enhance several aspects of your ride, allowing you to tackle various terrains with confidence. Here’s why tire pressure is so important:
- Traction: Tire pressure directly affects the amount of traction your tires have with the ground. Lower tire pressure allows the tire to deform more, creating a larger contact patch with the surface and increasing traction. This is particularly beneficial when riding on soft or loose terrain, such as snow or sand. However, if the pressure is too low, it can lead to poor handling and an increased risk of punctures.
- Comfort: The right tire pressure can significantly impact the overall comfort of your ride. Lower pressures provide more cushioning, which can help absorb vibrations and shocks from rough terrain. Conversely, higher pressures may result in a harsher ride, as the tires transmit more vibrations to the rider.
- Rolling resistance: Tire pressure also influences rolling resistance – the force that opposes the motion of your bike. Higher pressures typically reduce rolling resistance, making it easier to maintain speed on smooth surfaces. On the other hand, lower pressures can increase rolling resistance, particularly on softer surfaces, which may require more effort to maintain speed.
- Tire longevity and puncture protection: Proper tire pressure can help extend the life of your tires and reduce the likelihood of punctures. Over-inflating tires can cause premature wear and increase the risk of a blowout, while under-inflating can lead to pinch flats, where the tire gets pinched between the rim and an obstacle, causing a puncture.
Tire pressure is a crucial factor that affects traction, comfort, efficiency, and durability. It’s essential to find the right balance to optimize your fat bike’s performance on various terrains and provide an enjoyable riding experience.

Recommended Fat Bike Tire Pressure Based on Rider Weight and Tire Size
This table provides a general guideline for selecting the optimal tire pressure for your fat bike based on your weight and the width of your tires. These recommendations are a starting point, and you may need to adjust the pressure based on personal preferences, riding conditions, and specific tire models. Always use a high-quality tire pressure gauge designed for low-pressure tires to ensure accurate measurements.
| Rider Weight (lbs) | Tire Size (width in inches) | Soft Sand/Snow (psi) | Loose Gravel/Rocky Terrain (psi) | Hard-packed Dirt/Pavement (psi) |
|---|---|---|---|---|
| 100-125 | 4.0 | 4-6 | 7-10 | 10-15 |
| 100-125 | 4.8 | 3-5 | 6-9 | 9-14 |
| 100-125 | 5.0+ | 2-4 | 5-8 | 8-12 |
| 125-175 | 4.0 | 5-7 | 8-11 | 12-17 |
| 125-175 | 4.8 | 4-6 | 7-10 | 11-16 |
| 125-175 | 5.0+ | 3-5 | 6-9 | 10-14 |
| 175-225 | 4.0 | 6-8 | 9-12 | 14-20 |
| 175-225 | 4.8 | 5-7 | 8-11 | 13-18 |
| 175-225 | 5.0+ | 4-6 | 7-10 | 12-16 |
| 225+ | 4.0 | 7-10 | 10-14 | 16-22 |
| 225+ | 4.8 | 6-8 | 9-12 | 15-20 |
| 225+ | 5.0+ | 5-7 | 8-11 | 14-18 |
Remember to always use a high-quality tire pressure gauge specifically designed for low-pressure tires to measure and adjust your tire pressure accurately. Additionally, it’s important to experiment with these recommended pressures to find the optimal settings for your specific bike, tire model, and riding conditions.
Optimal Tire Pressures for Various Terrains
Optimal tire pressures for various terrains will depend on several factors, including rider weight, tire size, and personal preferences. However, here are some general guidelines for fat bike tire pressures based on different terrains:
- Soft Sand/Snow: For soft sand or snow, you’ll want lower tire pressures to allow the tire to deform and create a larger contact patch, which increases flotation and traction. Typical tire pressures for soft sand or snow range between 2 to 10 psi, depending on the rider’s weight and tire size.
- Loose Gravel/Rocky Terrain: When navigating loose gravel or rocky terrain, you’ll need slightly higher tire pressures compared to soft sand or snow. This helps maintain a balance between traction and puncture protection. The recommended tire pressures for loose gravel or rocky terrain are typically between 5 to 14 psi, again depending on the rider’s weight and tire size.
- Hard-packed Dirt/Pavement: For hard-packed dirt or pavement, you can use higher tire pressures to reduce rolling resistance and improve handling. Higher pressures also help protect the tires from pinch flats and other punctures. Tire pressures for hard-packed dirt or pavement usually range from 8 to 22 psi, based on the rider’s weight and tire size.
Please note that these recommendations are general guidelines and may require further adjustments based on personal preferences, specific tire models, and riding conditions. It’s important to experiment with different tire pressures to find the optimal settings for your bike and the terrain you’re riding on. Always use a high-quality tire pressure gauge designed for low-pressure tires to ensure accurate measurements.
Factors Influencing Tire Pressure
Several factors influence tire pressure for fat bikes, affecting both the recommended pressure range and the adjustments you may need to make to optimize your ride. Some of these factors include:

- Rider weight: Heavier riders may require higher tire pressures to support their weight and prevent pinch flats or other punctures. Conversely, lighter riders can typically use lower tire pressures for improved traction and comfort.
- Tire size: The width of the tire plays a significant role in determining the optimal tire pressure. Wider tires generally allow for lower pressures due to their increased contact patch, while narrower tires may require higher pressures to maintain stability and puncture protection.
- Terrain: As discussed earlier, different terrains require different tire pressures to achieve the best balance between traction, comfort, and efficiency. Soft sand or snow requires lower pressures, while hard-packed dirt or pavement calls for higher pressures.
- Tire construction: The design, materials, and construction of the tire can influence the optimal tire pressure. Some tires may have stiffer sidewalls that can handle higher pressures, while others may be more supple and require lower pressures for optimal performance.
- Personal preferences: Each rider has their own preferences when it comes to ride feel and handling. Some may prefer higher pressures for a more responsive ride, while others might opt for lower pressures for a smoother, more comfortable experience.
- Riding conditions: Weather and trail conditions can also impact tire pressure choices. For example, you may need to lower your tire pressure on wet or slippery surfaces to improve traction, or increase it on hot days when tire pressure tends to rise due to heat.
- Tire and rim compatibility: The compatibility between your tire and rim can also affect tire pressure. Some rim designs may require higher pressures to ensure the tire bead stays seated, while others may work well with lower pressures.
Given these factors, it’s important to experiment with various tire pressures and regularly check your tire pressure using a high-quality gauge specifically designed for low-pressure tires. This will help you find the ideal tire pressure for your specific riding style, preferences, and conditions.
Finding the Perfect Balance
Finding the perfect balance in tire pressure for your fat bike requires a combination of understanding the factors that influence tire pressure and experimenting with different settings to find what works best for you. Here are some steps to help you find that optimal balance:

- Start with a baseline: Use a tire pressure recommendation table or guidelines provided by the tire manufacturer as a starting point. This will give you an idea of the appropriate pressure range based on your weight, tire size, and the terrain you’ll be riding on.
- Evaluate your riding preferences: Consider your riding style, the type of terrain you ride most often, and your preferences in terms of comfort, traction, and handling. Do you prefer a more responsive, firm ride or a softer, more cushioned feel? Your preferences will influence the adjustments you make to your tire pressure.
- Experiment with adjustments: Armed with your baseline pressure and an understanding of your preferences, begin experimenting with different tire pressures. Make small adjustments (e.g., 1-2 psi) and take note of how the changes impact your ride. Pay attention to traction, comfort, and handling.
- Take note of different conditions: Weather, trail conditions, and even altitude can impact tire pressure. Experiment with various pressures under different conditions and take note of the changes in performance. This will help you adapt your tire pressure to different scenarios.
- Regularly check and adjust: Tire pressure can change due to factors such as temperature, altitude, and time. Invest in a high-quality, low-pressure tire gauge and check your tire pressure before every ride. Make any necessary adjustments based on your observations and preferences.
- Monitor tire wear and puncture frequency: Keep an eye on your tires for signs of uneven wear or an increased number of punctures. These can indicate that your tire pressure is either too high or too low, and you may need to make further adjustments.
- Share and learn from others: Talk to fellow fat bike riders, join online forums, or consult with local bike shops to gather insights and recommendations from others with similar riding styles or preferences. Learning from the experiences of others can help you refine your tire pressure settings.
Remember that finding the perfect balance in tire pressure is an ongoing process that involves experimentation, observation, and adaptation. By following these steps and regularly monitoring and adjusting your tire pressure, you’ll be well on your way to optimizing your fat bike’s performance for a more enjoyable riding experience.
How to Measure and Adjust Tire Pressure

Measuring and adjusting tire pressure accurately is essential to ensure optimal performance, safety, and longevity of your fat bike tires. Here is a step-by-step guide on how to measure and adjust tire pressure:
- Invest in a high-quality tire pressure gauge: Since fat bike tire pressures are typically lower than standard mountain bike or road bike tires, it’s crucial to use a gauge designed specifically for low-pressure tires. Digital gauges are often more accurate and easier to read than analog ones.
- Check tire pressure before every ride: Tire pressure can change due to temperature fluctuations, altitude, and time. To maintain optimal tire pressure, check it before each ride.
- Find a stable surface: Place your bike on a flat, stable surface to ensure accurate measurements. Ensure the valve stem is easily accessible.
- Remove the valve cap: Unscrew the valve cap from the tire’s valve stem and keep it in a safe place to avoid losing it.
- Attach the pressure gauge: Press the tire pressure gauge onto the valve stem, ensuring a tight seal to prevent air from escaping. If you’re using a digital gauge, it should display the current tire pressure. For an analog gauge, note the position of the needle on the dial.
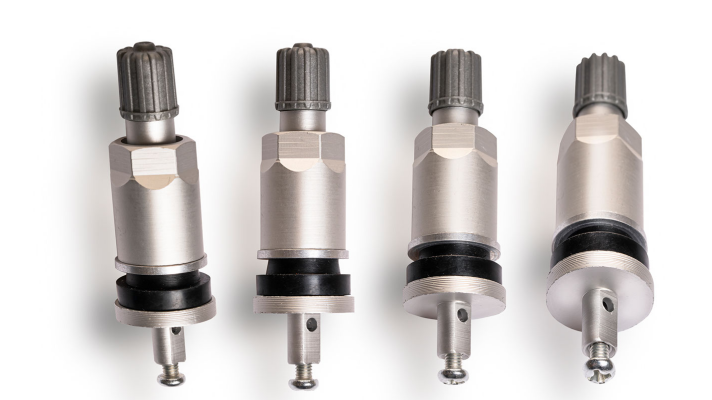
- Adjust the tire pressure: If the measured tire pressure is higher than your desired pressure, gently press the valve core with a small tool (like a pen, or even your fingernail) to release air. If the pressure is too low, use a high-quality floor pump or a dedicated low-pressure pump to add air. Make sure the pump is compatible with your bike’s valve type (Presta or Schrader).
- Re-measure the tire pressure: After adjusting the pressure, reattach the gauge to the valve stem to ensure you’ve achieved the desired pressure. Repeat the process of adding or releasing air until you reach the optimal tire pressure.
- Replace the valve cap: Once you’ve achieved the desired tire pressure, remove the gauge and replace the valve cap to protect the valve stem and prevent dirt or debris from entering.
- Repeat the process for the other tire: Make sure to measure and adjust both the front and rear tires, as they may require different pressures based on rider weight distribution and handling preferences.
By regularly measuring and adjusting your fat bike’s tire pressure, you can optimize performance, enhance safety, and prolong the life of your tires. Remember to experiment with different tire pressures to find the perfect balance for your riding style, preferences, and conditions.
Alright, buckle up for a rollicking conclusion!

In the wild and wacky world of fat biking, there’s one thing that can make or break your ride, and that’s tire pressure. Yep, you read that right! The air in your tires plays a starring role in how smooth or bumpy your journey will be.
Now, we know what you’re thinking: “But there are so many factors to consider!” Fear not, my adventurous friend! With a little experimentation and a keen sense of observation, you’ll be a tire pressure guru in no time.
Remember, you’re looking for the Goldilocks of tire pressures—just right for your weight, tire size, terrain, and personal preferences. And just like Goldilocks, you may need to try a few options before finding the perfect fit.
But don’t let that deflate your enthusiasm! Grab a trusty low-pressure tire gauge, pump up those tires, and let the good times roll (quite literally). Keep an eye on your tire pressure before every ride, and you’ll be cruisin’ for a bruisin’—except without the bruising, because, well, you’ve mastered tire pressure!
So go on, intrepid fat biker, conquer those trails with the right tire pressure and ride like the wind. It’s time to inflate your fun and deflate your worries!
4BiKE Cycling Marketplace is an international e-commerce platform dedicated to the cycling industry. Founded in 2014, the company operates online marketplaces in the United Kingdom (4bike.co.uk) and the United States (4bike.us), as well as a business-to-business platform (4bikebusiness.com) that caters to the global cycling community. 4BiKE focuses on providing vendors with comprehensive support and services, including subscription-based plans, high SEO standards, marketing support, and streamlined sales processes.
